Warm weather brings out more than swimsuits and flip flops. Tick populations surge during spring and summer, bringing with them the potential for transmitting harmful diseases to your pet.
Although year-round tick prevention should minimize your pet’s tick exposure, you may still encounter the occasional live or dead tick on your pet, because most prevention products work by killing the tick after attachment, not on contact.
Knowing how to correctly remove a tick can further reduce your pet’s susceptibility to disease transmission. If you find a tick on your pet, follow these removal tips from the Towne Centre Animal Hospital team.
#1: Don’t panic
If ticks make your skin crawl, you likely will first shriek or flee when you find one on your beloved pet. But, these reactions can frighten your pet and make removing the anxiety-inducing arachnid more difficult.
If you find a tick on your pet, stifle your reflexive panic response and remain neutral. Don’t dwell on the tick’s disease-carrying potential or its blood-sucking behavior, and instead concentrate on how you’ll extract and dispose of this eight-legged interloper.
#2: Confirm that your pet’s bump is a tick
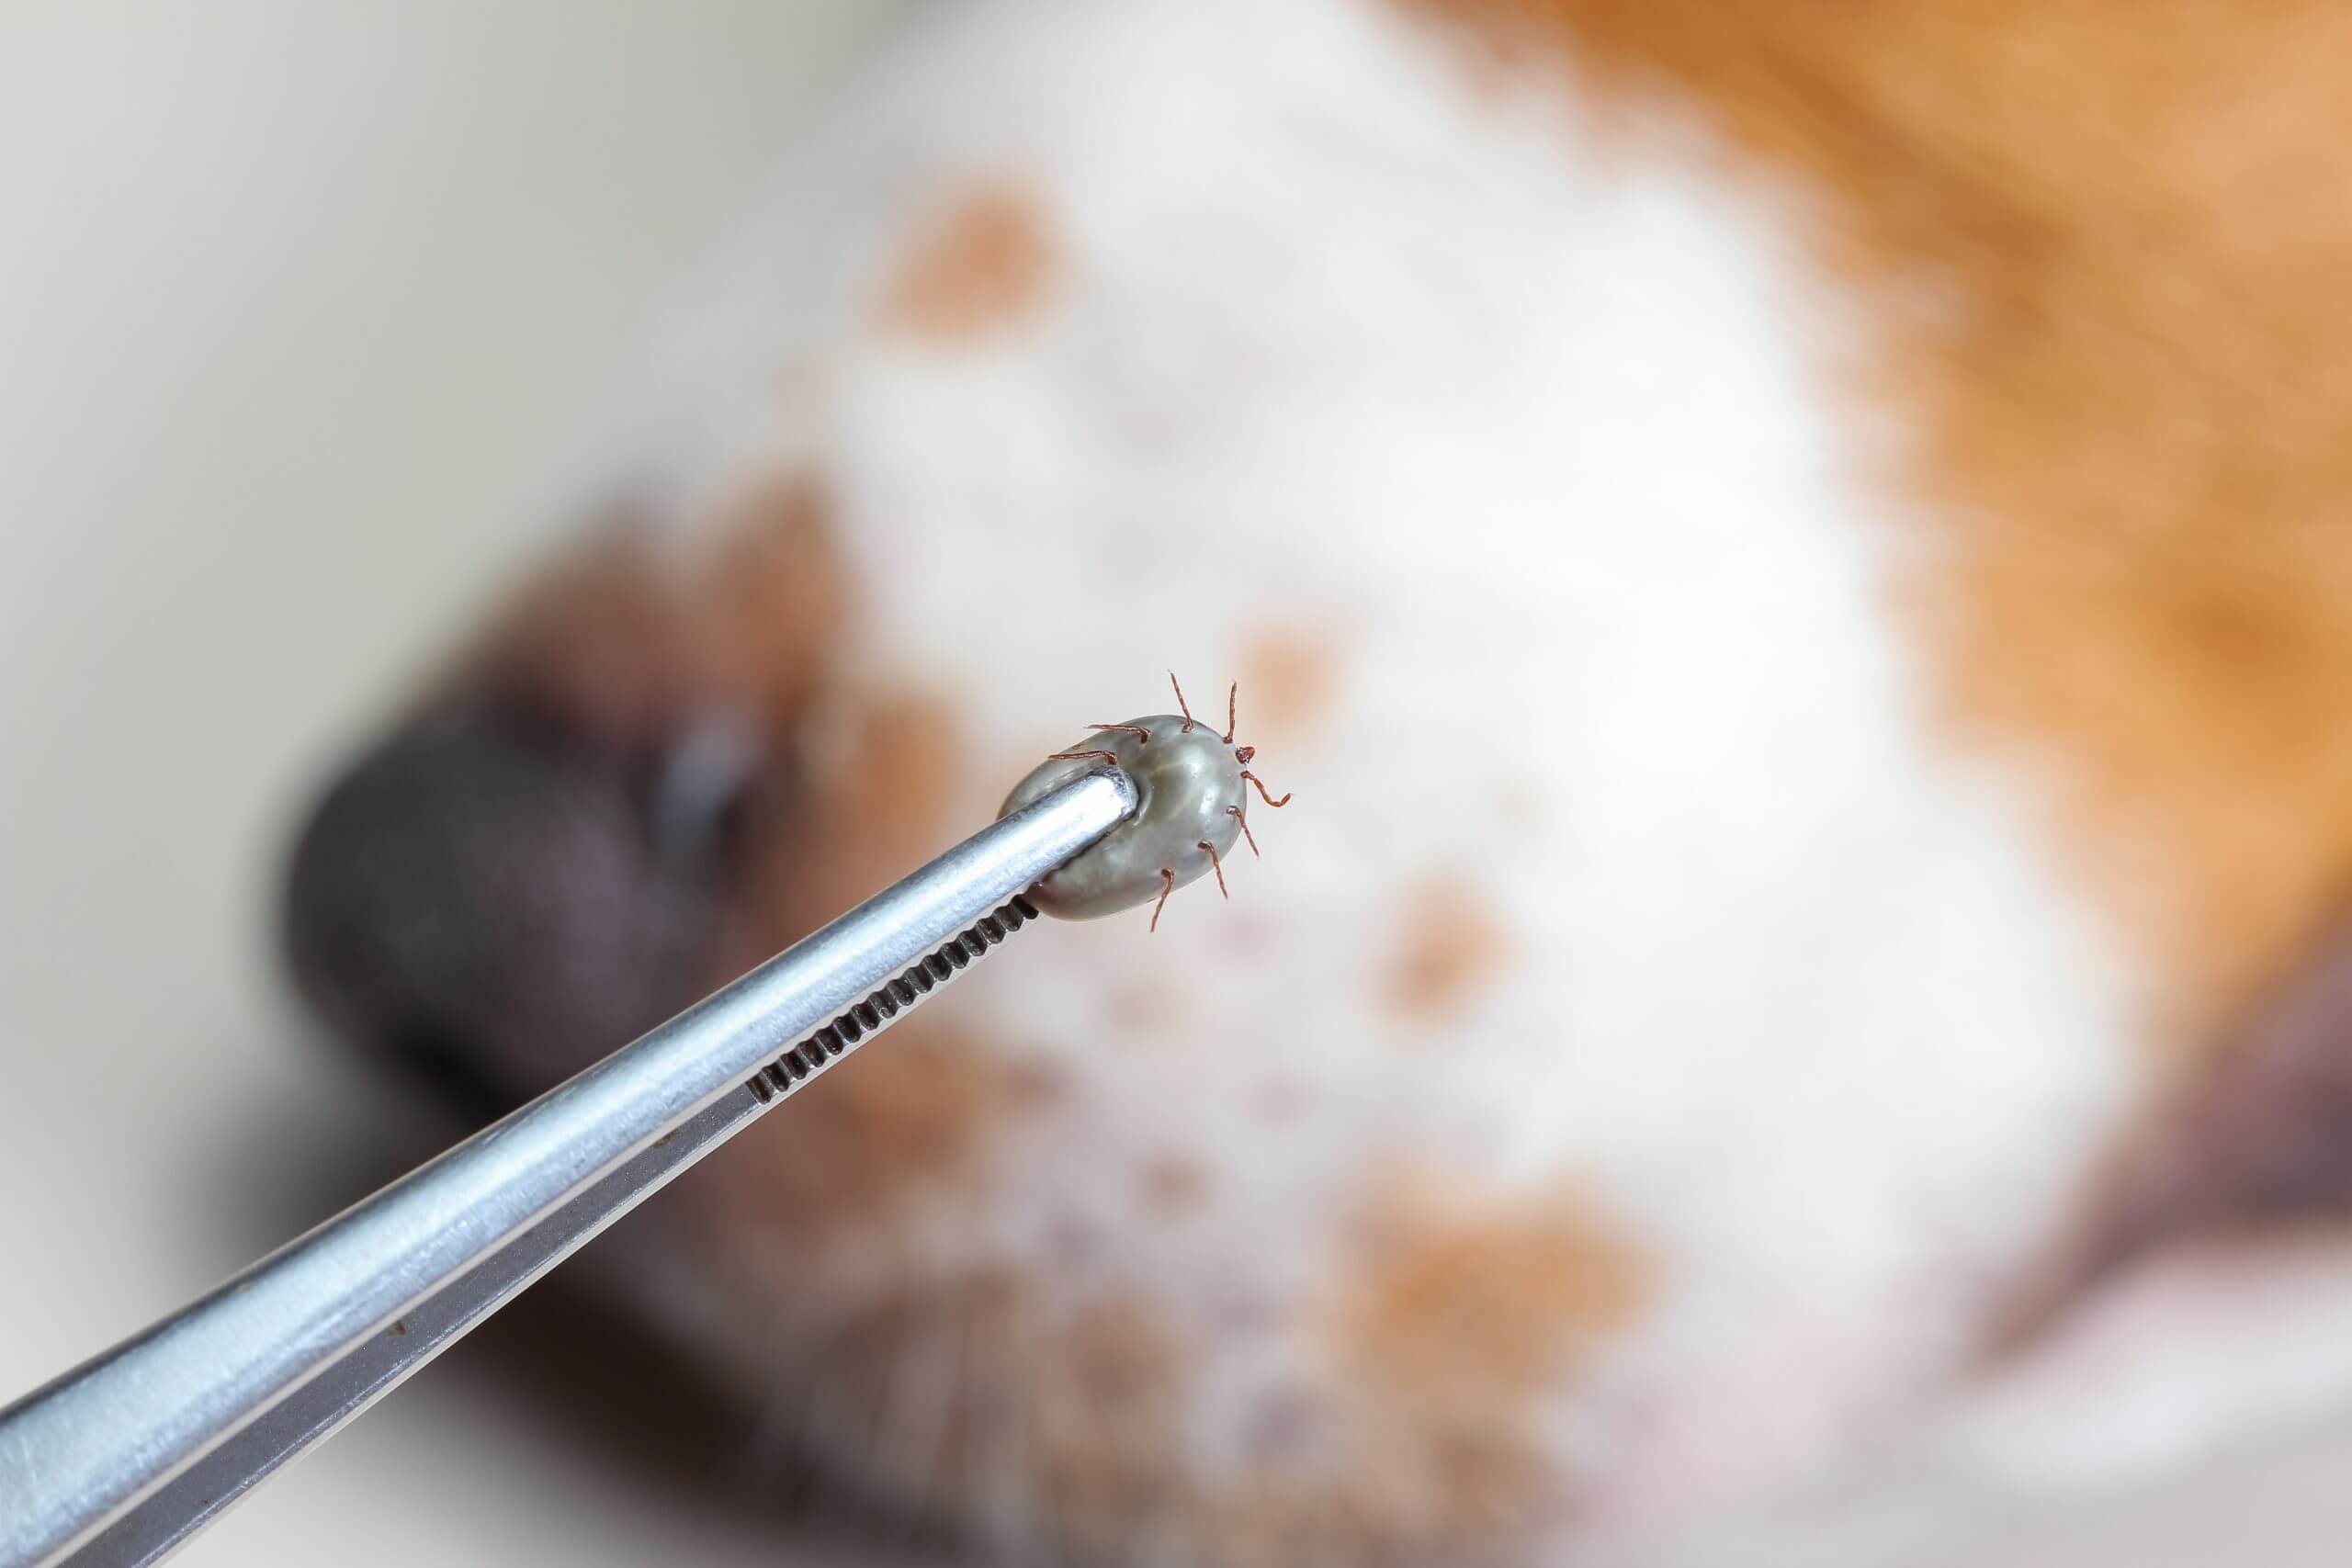
This step may seem silly, but your pet will be saved from significant discomfort—and you will be saved some embarrassment. Many well-intentioned owners mistake skin masses, warts, and nipples for ticks, which they attempt to remove. So, take a close look before you get the tweezers. Ticks have one attachment point at the head and six to eight visible legs, depending on their life stage. Engorged ticks will be swollen and possibly a grey color, while recently attached ticks will be relatively flat and brown.
#3: Use tweezers or a tick tool to remove your pet’s tick
Effective, safe tick extraction involves removing the entire tick, including the head and mouth parts, and minimizing direct contact.
Narrow-tipped tools, such as tweezers, blunt hemostats, and specially designed tick removal items, are the best way to achieve effective removal. Never use your bare fingers to remove the tick, squeeze, pinch, or twist the tick’s body, or try to burn a tick with matches.
#4: Grasp close to the tick’s head without pinching your pet’s skin
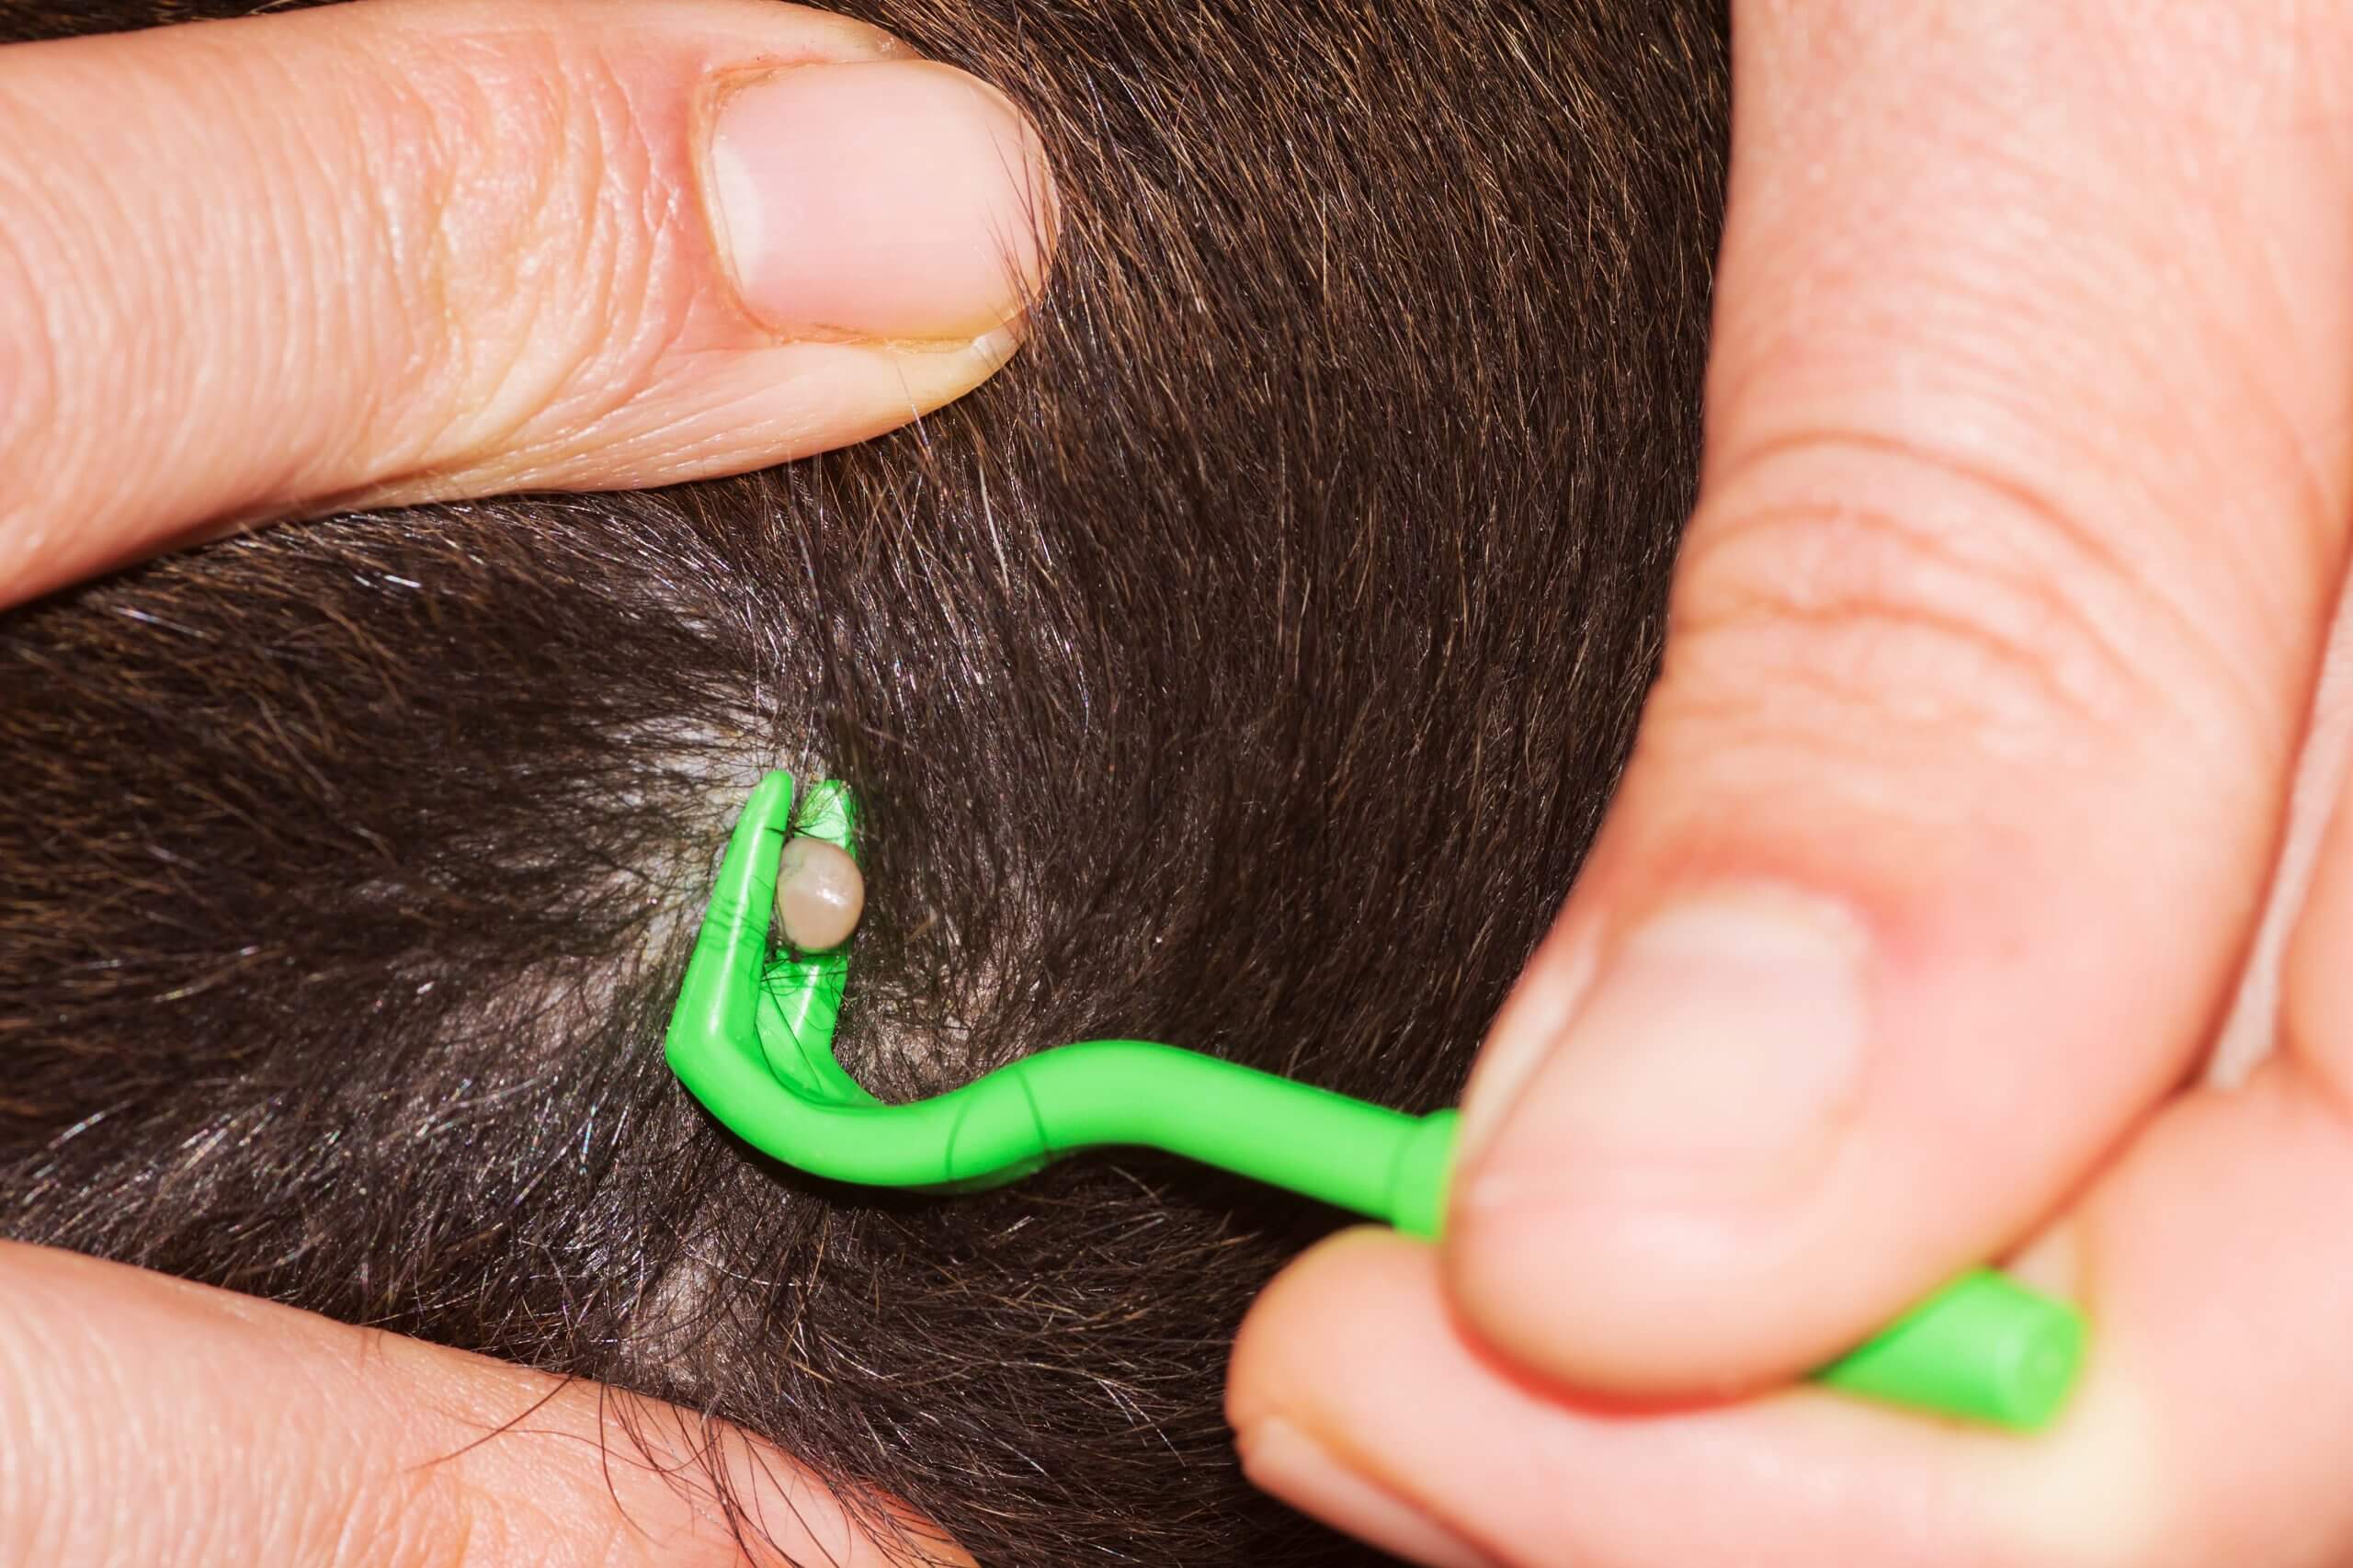
Avoid breaking or not removing the tick completely by grasping the tick’s head, or grasping the tick as close to your pet’s skin as possible without pinching their skin. If your pet is dark-coated or their skin pigmented, you may need to move to a well-lit area or use a flashlight to ensure a good grip. Once you have secured the tick, apply gentle and even pressure, and pull the tick straight up from the skin. Your pet may react to the brief tugging sensation but should not be overly upset.
If the tick’s mouthparts or head are still lodged in your pet’s skin, you can carefully attempt to remove them, or you can monitor the area for irritation until the remaining pieces dry up.
#5: Reward your pet and dispose of the tick
Once you’ve successfully removed the tick, you’ll likely want to get rid of it as quickly as possible, but proper disposal is important to ensure the tick is not still alive and a threat. Safely dispose of the tick by:
- Flushing down the toilet
- Wrapping in tape
- Submerging in rubbing alcohol
- Placement in a sealed bag or container
Then, ensure you praise, pet, and give your dog a treat for their cooperation.
If you’re interested in identification, seal the tick in cellophane tape or take a picture. The University of Rhode Island’s Tick Encounter website is an excellent resource for identifying and learning about tick species and regional activity.
#6: Wash your hands and check your pet for additional ticks
Always wash your hands after handling a tick or tick removal tools. Although disease transmission from this simple contact is highly unlikely, hand washing will eliminate any bacteria that may have transferred to your skin.
Next, check your pet from nose to tail for any additional ticks. Although ticks can attach and feed anywhere on your pet, they prefer certain areas, including:
- In and around the ears
- Around the eyes
- Between the toes
- Under the tail
- In the axillary area (i.e., armpits)
- On the groin
Run your fingers along your pet’s fur, first with the hair, and then against it, feeling and looking for small bumps.
#7: Review or reevaluate your pet’s tick prevention plan
The best ticks are dead ticks, but if you’re finding multiple live and attached ticks on your pet, you should reassess their tick prevention plan. Steps include:
- Review your dosing frequency — Are you giving your pet’s preventive regularly, every 30 or 90 days? Did you forget a dose?
- Consult product instructions — Are you correctly applying your pet’s topical preventive and avoiding baths or swimming for the recommended period?
- Test your dog for tick-borne illness exposure — Yearly testing can detect exposure to Lyme disease, Rocky Mountain spotted fever, anaplasmosis, and ehrlichiosis.
- Avoid areas where ticks are common — Ticks are more prevalent in wooded or grassy areas.
- Speak to your veterinarian — Your veterinarian can provide additional insights or recommend more appropriate preventives.
Ticks are tiny but cunning, but with year-round prevention, early detection, and prompt removal, you can protect your pet from harmful tick-borne infectious diseases.
Let’s stick it to ticks! Contact the Towne Centre Animal Hospital team to discuss your pet’s tick-prevention protocol and receive our customized preventive recommendations.